3.2.8 Manage Platform
When clicking the "Manage Platform" button, the system will automatically pop up the "Manage Platform" main window. This platform primarily consists of three core functional modules: "Slice List", "Device Manager", and "Material List".
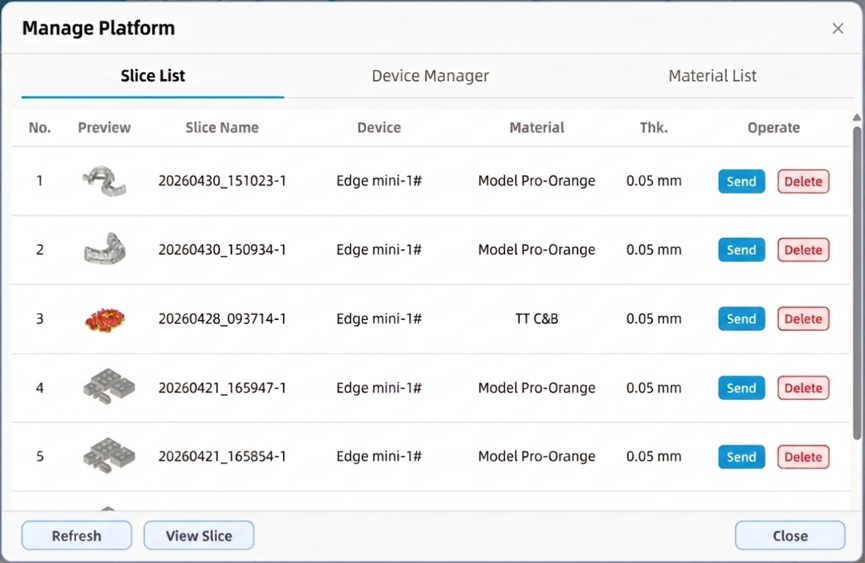
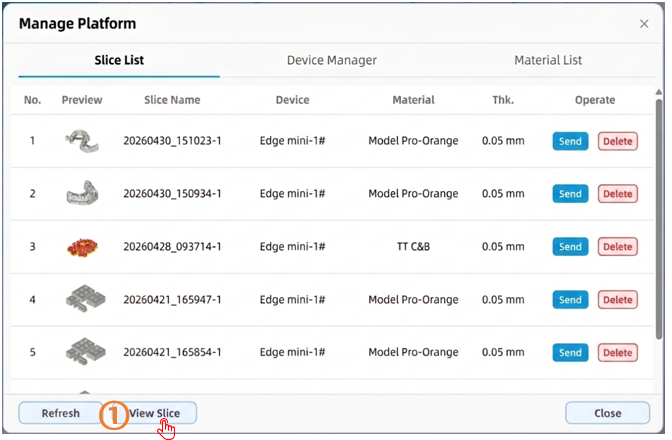
Slice List: All print jobs will be displayed in this list, which includes core information such as image preview, slice name, printing device, printing material, layer thickness, and operation options. The list automatically refreshes periodically, and users can also click the "Refresh" button to perform an immediate manual refresh. Additionally, users can view specific slicing jobs in detail using the following two methods:
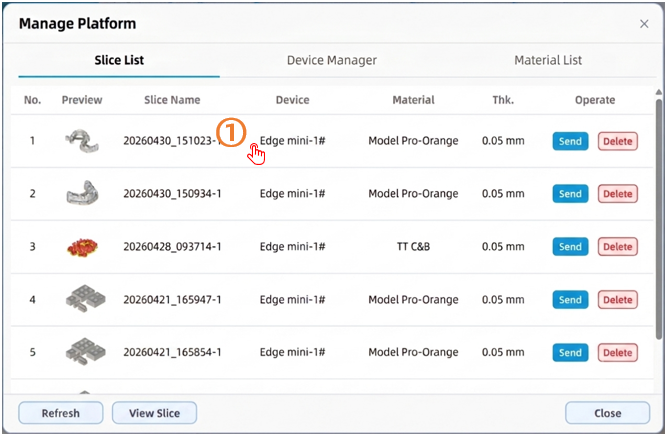
1) Direct Click: Click directly on a designated slicing job to open the detailed slice file information pop-up window. Users can review all configuration parameters for the job, preview the sliced layer images, or manually save the slice file (in RS format) to a local directory.
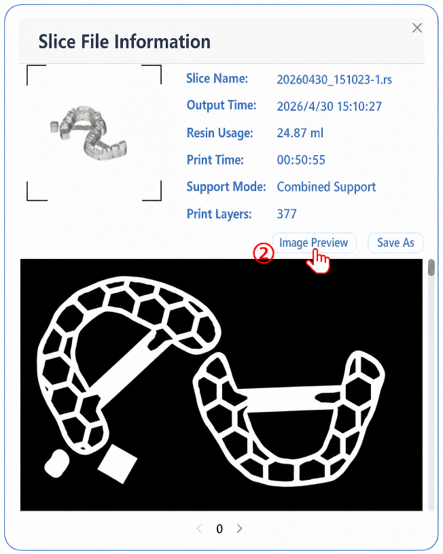
2) Click the "View Slice" Button: Used to import and view the detailed information of RS format slice files that were previously saved to the local directory and generated by the ShapeWare 2.0 software.
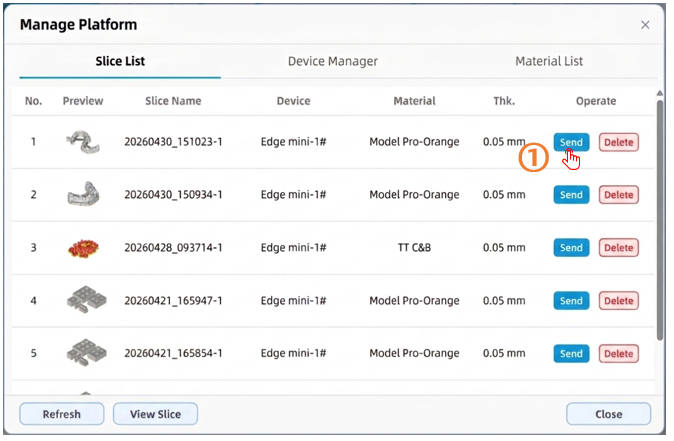
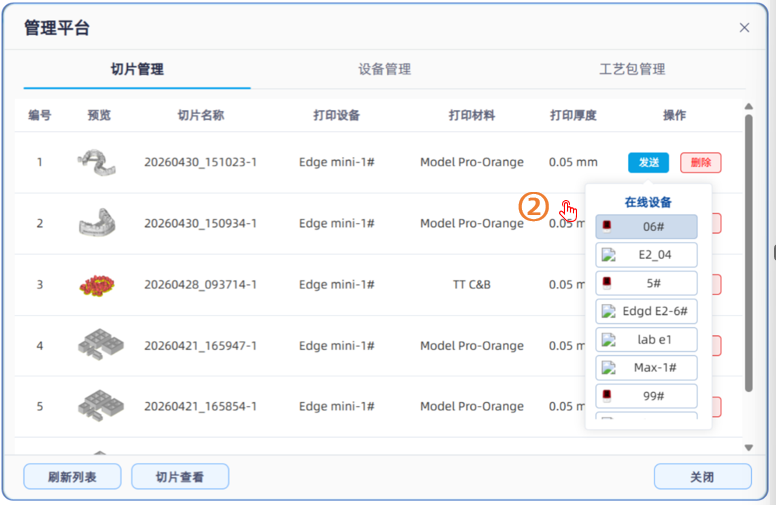
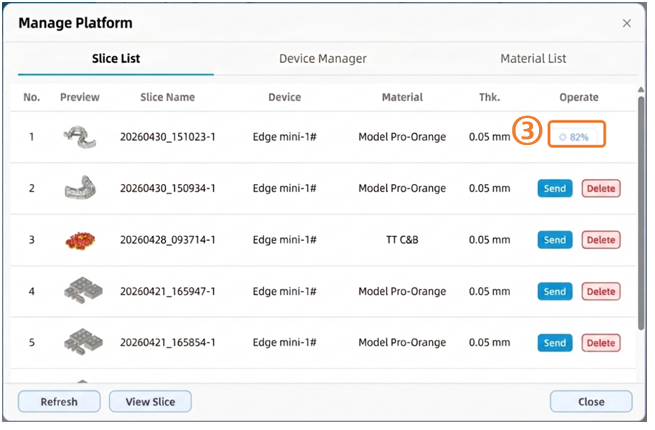
The print jobs in the list can be uploaded or deleted. When a user clicks the "Upload" button, a drop-down menu of bounded devices will pop up; clicking to select a target device from the menu will transfer the print job to the printer. Alternatively, users can also click the "Delete" button to remove the print job from the current list.
Device Manager: All networked printing devices (please ensure that the devices and the computer running the slicing software are connected to the same Local Area Network) will be clearly displayed in this list. The columns encompass Preview, Device Name, Device Type, IP Address, Status, and Operate. The list automatically refreshes periodically, and users can also click the "Refresh" button to perform an immediate manual refresh. Users can delete specific devices from the list. However, please note that once a device is manually deleted, it will no longer automatically appear in the list even if the "Refresh" button is clicked; it must be re-connected by clicking the "Add Device" button. Users can also rename a device; once changed, the new name will be synchronized and updated both in the available device drop-down menu on the "Slice List" interface and on the touchscreen of the printer.
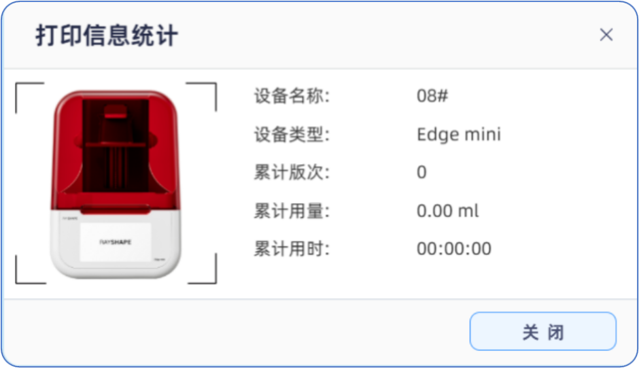
Additionally, users can select and click any device in the list to open the "Print Statistics" pop-up window. This window aggregates the device's historical cumulative print batches, total resin consumption, and overall service hours, enabling users to easily track the primary operational metrics within the equipment's service life cycle.
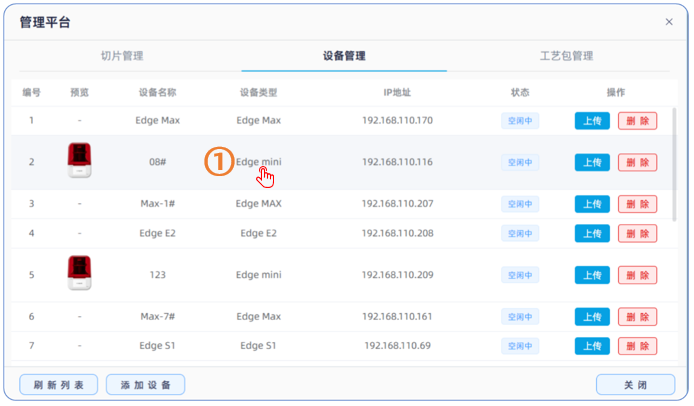
Meanwhile, users can click the "Upload" button on the right side of a designated device to transfer the RS format slice files,
- Material List: This module primarily consists of three core categories: Official Material, Third Party Material, and Custom Material. Specifically, Official Material refers to the standard resins developed and commercialized by RAYSHAPE. The Third Party Material library contains compatible materials produced by external manufacturers that have undergone rigorous testing and mutual certification by RAYSHAPE. Custom Material is a personalized process database added by users based on their specific clinical or production needs, supporting the creation of new materials or the modification of existing parameters.
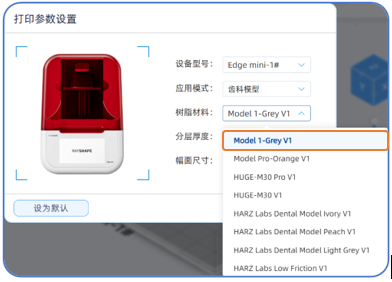
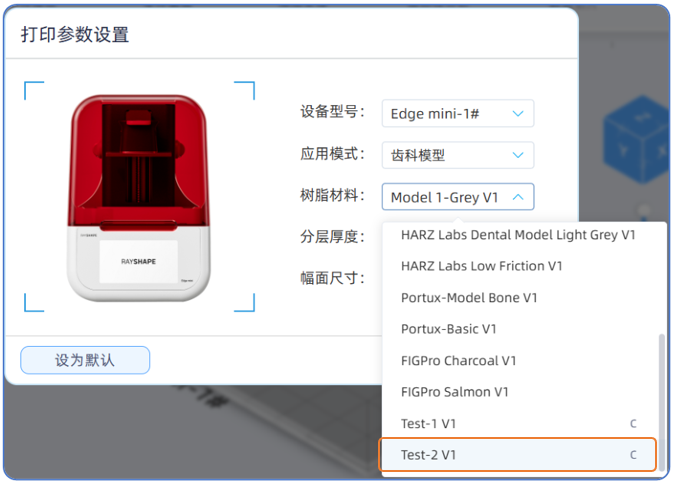
The materials from these three categories within the Material List will be directly synchronized and displayed in the "Print Parameter Settings" drop-down list. By default, the system displays the complete material eco-system. If a user only requires one or a few specific materials for daily operations, they can configure the settings within this Material List interface to hide all other irrelevant materials.
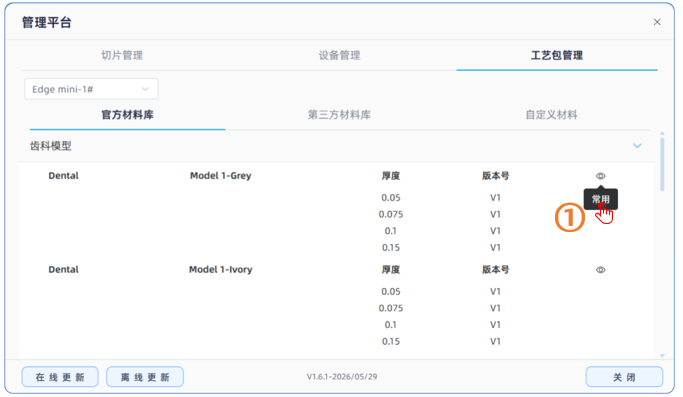
The materials configured in the Official Material and Third Party Material libraries are all standard resin profiles obtained through extensive testing by RAYSHAPE, yielding the highest compatibility with the printing equipment. It is highly recommended that users do not modify these default parameters arbitrarily. Users can execute an online upgrade to the latest process package version based on the update notification badge appearing on the top right of the "Online Update" button.
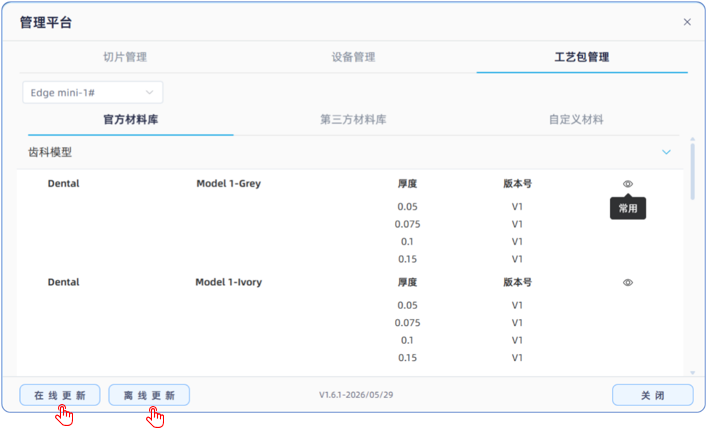
If users need to add a new material process, they can use one of the following two methods:
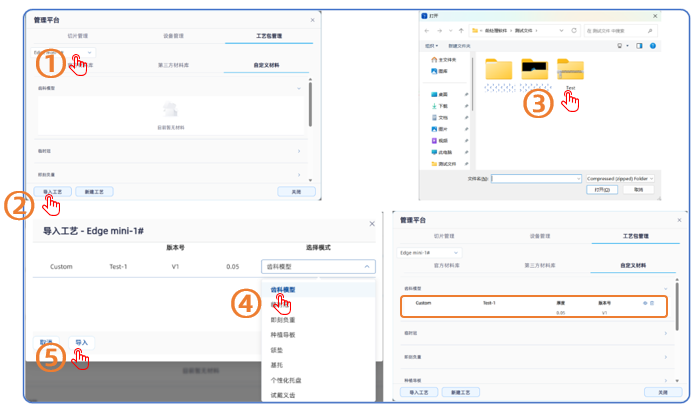
Resin profile Import: If users receive a resin profile package file (in ZIP format), they can designate the target printing device model in the top drop-down menu, then click the "Offline Update" button at the bottom and select the corresponding material application category to complete the process data import. The imported process will be automatically categorized into the Custom Material library.
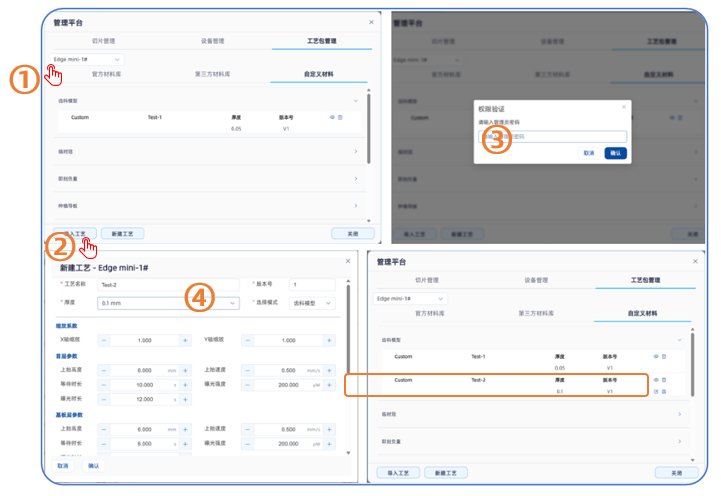
2) New created resin profile, after specifying the device model that needs to be imported and entering the administrator password for privilege verification, the resin profile editor will pop up. Users can choose to input the corresponding options and parameters by themselves, and click the "Confirm" button after inputting to complete the new creation.
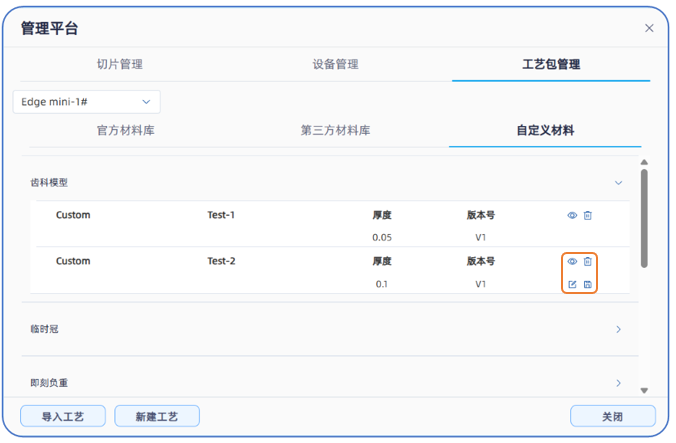
For the imported or newly created resin profiles, users can perform editing and saving as, as well as showing/hiding and deleting. Among them, the newly created process packages will be displayed with a "C" tag in the "Print Parameter Settings" pop-up window.
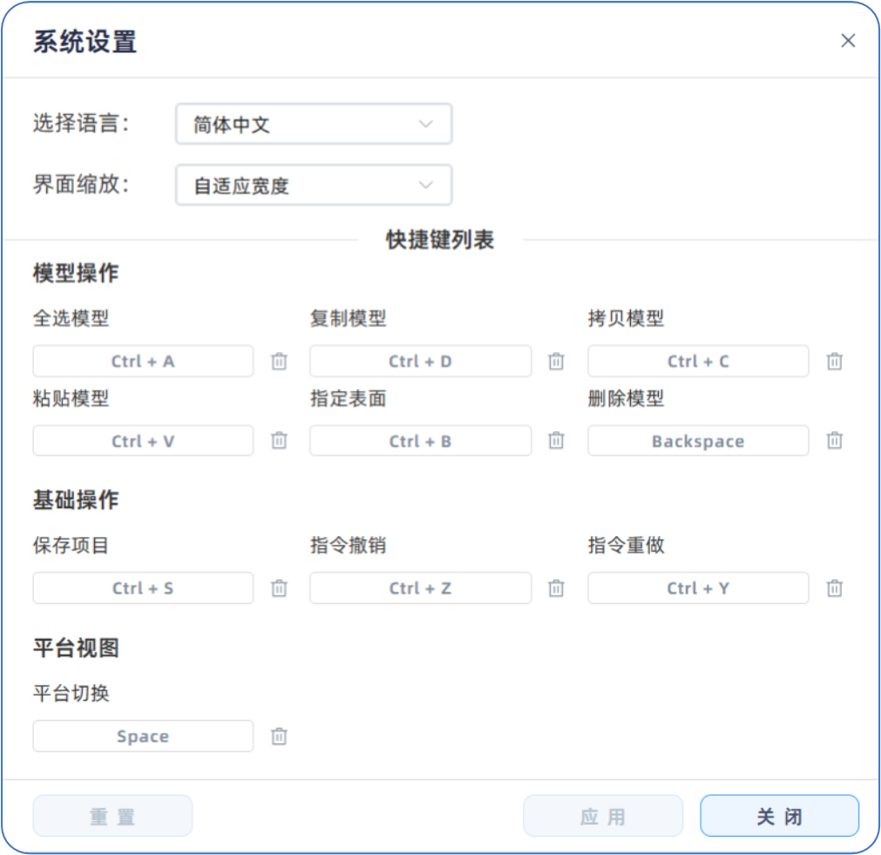
- Settings, including language selection and the shortcut list. In the shortcut list, users can click the corresponding display box and then press the desired keys to configure their custom preferences; if you need to unbind a shortcut (when conflicting with the system or other software), click the "Clear" icon next to the display box to remove the shortcut; you can also click the reset button to restore all shortcut settings to default.
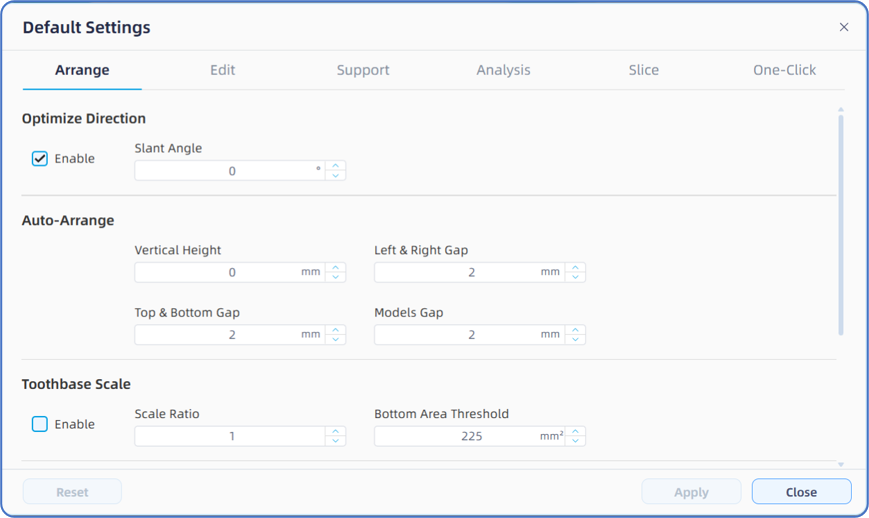
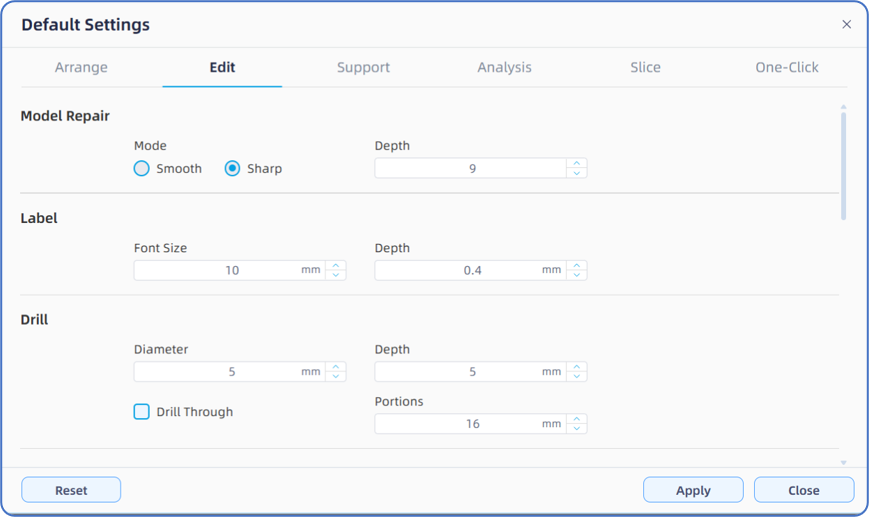
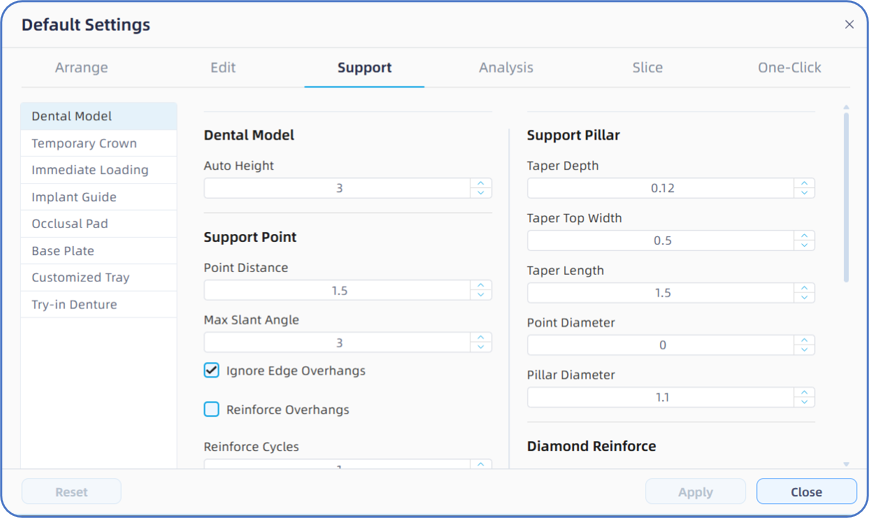
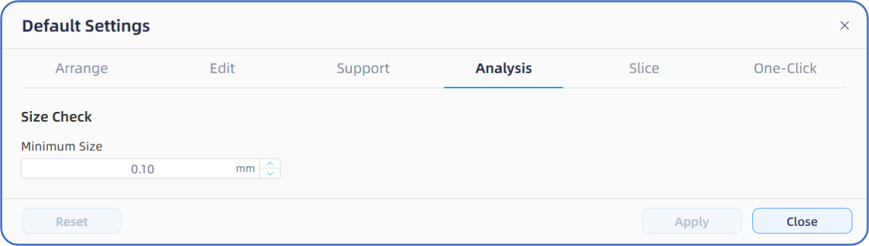
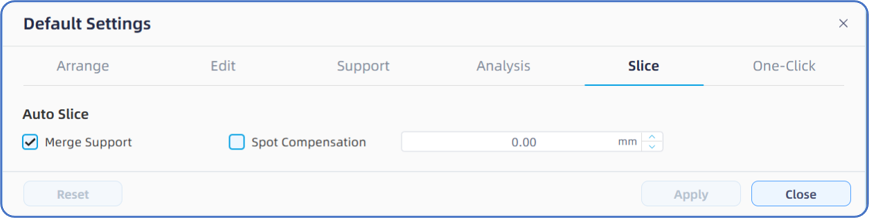
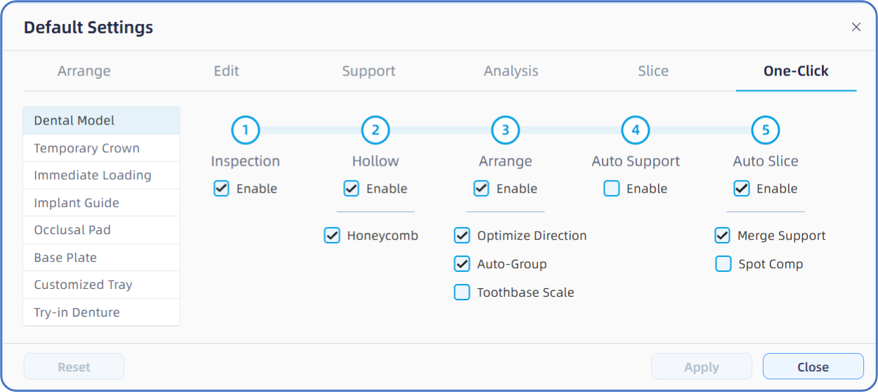
-Default Settings, mainly including Placement, Edit, Support, Printability, Slice, and One-click. It should be noted that the first five items belong to the backend management platform for workflow management configuration, but their underlying parameters will be applied to the One-click function; that is, when the corresponding options are checked in One-click, the respective values of the first five items will take effect accordingly. In addition, the parameters configured by users on the frontend (the left toolbar) will only apply to the current operation; the software will not record these parameters or persist them for the next launch. If configuration retention is required, users must configure them within this Default Parameter Management interface. The instructions for Default Parameter Management are as follows:
1) Arrange:Click here to jump to the detailed content.
2) Edit:Click here to jump to the detailed content.
3) Support:Click here to jump to the detailed content.
4) Analysis:Click here to jump to the detailed content.
5) Slice:Click here to jump to the detailed content.
6)One-Click:Click here to jump to the detailed content.
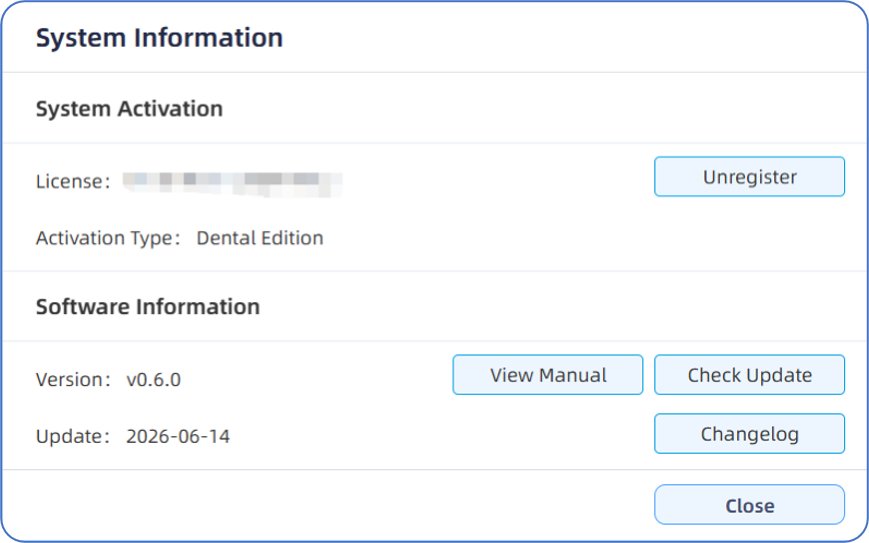
-System Information, mainly including Software Activation and Software Information.
1) Software Activation, which can be used for operations such as activating the software and viewing software information.
2) Software Information, where you can view the current software version. If there is an update notification (red dot prompt) above the upper right of the "Check for Updates" button on the right, users can connect to the internet to check and update to the latest officially upgraded software version. After updating, users can click the "View Changelog" button to the right of the update date to view the newly added functions and optimizations.